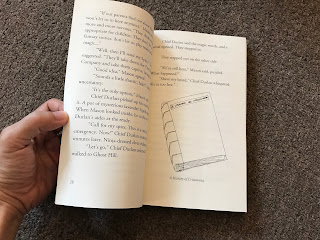
Big Bro and Big Sis published their first 123-page novel on amazon.com.
It is a concept unheard of in our time. I asked Big Bro to share how the whole process of publishing with Kindle Direct Publishing Paperbacks works.
* * * *
Guest Post by I.Y.Su
After you have your draft ready, in Word or Docs or whatever, you have to look at your page size. Default on Word is 8 by 11 inches, which is the normal white printer/office paper. If you want your book to be the size a novel, such as Theodore Boone: Kid Lawyer, what size are you supposed to be working on? Is there a standard? I wondered about this myself some time ago. The standard- and you don't have to follow this- is 6 by 9 inches.
Now, you of course can use this size, but you must consider the number of pages you will end up with. When I converted my pages from 8X11 inches to 6X9 inches, I ended up with about 50-60 pages. Your book will end up being tall but thin.
So I converted it to 5X8 inches. It can be even smaller, but just make sure the size you want is available in KDP.
After you have those out of the way, we can get to the fun part. Go to https://www.kdp.amazon.com and sign in with your Amazon account (This would be your parents' account, unless you're above 18). Go to "Create a New Title" and select Paperback (we'll be only talking about paperbacks today).
Next, enter the needed information on the form.
If you have written the book yourself, go ahead and select I own the copyright and I hold necessary publishing rights.
Tip: Once you have written down the description, copy it (Windows: Ctrl+C, Mac: Command+C). You will need it later.
Save and continue.
Below you see the options I made for my novel, A Doorway to Magic.
A Note on Matte and Glossy Cover Finishes
What's the difference between Matte and Glossy? Matte is more of a thick paper cover, but glossy has more of a shine and glimmer to it, a slick feel. I prefer the glossy, but it's your choice.
Next, upload your manuscript. I believe KDP allows Word files, but it's best to convert your word file to an adobe PDF file before you begin. In Word, go to File and in the list you will see "Convert to Adobe PDF".
Then, start on your cover. You can upload your own cover, or you can use KDP's new cover creator tool.
Here you see the cover in progress for A Doorway to Magic. I drew and created my own cover photo, but if you can't do that, you can use KDP's great stock images.
When this is all done, launch the Previewer. This may take a while.
When the previewer has loaded, fix any error. Don't pay too much attention to the FIX and PLEASE CHECK notifications.
Now we get to pricing.
Here you see the pricing I chose for A Doorway to Magic.
Let's say you put your pricing at $4.99 USD. Then, if you choose 60% royalty, 67 cents go to you. Yup. The rest goes to Amazon. As you can see, my 123-paged book is set at $2.33 for the printing. $2.33 and more goes to Amazon. Hey, they got to make money too, I suppose.
Here's a tip for pricing your books. If the sales come in, notch your price up a bit. If they continue, notch it up another dollar. If sales slow down, bring it down a bit.
And that's all! All you have to do now is HIT THAT PUBLISH BUTTON. In a few hours or so, your book will be on Amazon and available for purchase.
*Note from mom: the pricing part was the most confusing to us. In the end we realized, there is NO upfront cost at all. And Amazon makes sure you do not have the choice to "make a loss" (as in you cannot price your book so low it's lower than printing cost). They only print the books whenever a sale comes in.
Optional step: Hyping
I'll leave this step to you. My ways:
. Put the news about it on my website
. Make some YouTube vids about it
. Spread it across social media
. Tell people about it (note from mom: especially tell grandparents about it)
. Ask mom (nicely, please) to share with her friends and family. (added by mom)
There's always room for another great story. Why shouldn't it be yours?
* * *
Their book is available for purchase here
Read more about the book here


I've ordered two....
ReplyDelete